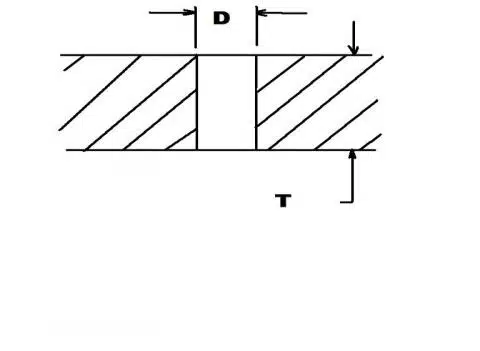
A common question asked by Design Engineers in concurrent engineering is whether a particular hole in a part is castable? To answer that question requires an analysis of the four dimensional components that constitute the description of the hole: diameter, length, diametrical tolerance and locational tolerance.
First, I should be very clear that the casting of holes is a “good thing”. Holes are the type of part detail that can generally be provided by the investment casting process at negligible cost to a customer. Cast holes can also be of benefit to the foundry as they enhance the dimensional stability of a casting.
Straight through-holes are more easily cast than are blind holes. For the purposes of this essay we’ll confine our attention to straight holes that are open from both ends. I shall address the special circumstances of casting blind holes and internal cores in other blogs.
Roundness: Let’s begin with an understanding that the form, or shape, of a cast hole is never “perfect” (but neither is a machined hole) and will vary slightly in size and shape along its length. This loss of perfection is induced by the contraction of the hot metal as it cools in the casting. As a result the diameter of a cast hole can be pulled out of shape as areas around it solidify and become smaller. A second phenomenon concerns holes cast through a thin thickness of metal tending to nonfill unevenly around the diameter. The measurement of the location of a cast hole can sometimes be difficult as any loss of accuracy in determining the centerline of an imperfect shape also diminishes the accuracy of the measurement.
Diametrical Tolerance: The tolerance on the diameter of a hole must conform to Standard Investment Casting tolerances (approximately ±.005 inch/inch) as do all cast features. Additional tolerance will required dependent on the length of hole being cast.
Diameter to Length Ratio: To reproduce a feature it is necessary for investment casting to build a minimum number layers of ceramic shell in or about it. In the case where a hole diameter is too small relative to its length the ceramic will be unable to fully form and the shell will fail when cast with metal. The ratio between the diameter and length of the hole will determine if the feature is castable.
The smaller the diameter of a through-hole the shorter the length that can be cast. For example a hole diameter of Ø.06” can be cast up to two diameters in length where a Ø.25” hole can be cast up to five diameters in length.
In instances where the diameter to length ratio is too small there is an alternative option to produce the hole from a preformed ceramic core. Preformed ceramic core add expense to the casting but are a very viable option for the manufacture of fine detail that can’t be otherwise be produced directly by the investment casting process. For more information about ceramic cores please see a related blog on the casting of blind holes and internal cores.
Locational Tolerance: The locational tolerance for a hole is more often an issue than is its form tolerance. The locational tolerance of holes must be in accordance with Standard Investment Casting Tolerances (approximately ±.005 inch/inch). As locationally important holes can be machined to a much higher tolerance cast through-holes are most often used for less critical features such as fluid flow passages, wire feeds or for ventilation.
A Designer can, however, sometimes mitigate a locational tolerance with some creative dimensioning. For example, cast holes might require less tolerance if dimensioned to nearby “local” features rather than directly to the datums.
O’Fallon Casting publishes an Investment Casting Design Guide that is available for free download on its website. The Design Guide contains tables that delineate the castable sizes of holes. Please download the Design Guide and in the event that your requirements are inside of the industry recommendations contact your O’Fallon Casting Sales Engineer to verify if a design is manufacturable.
